Moose sausage bounty

Long, long overdue was the making of sausage from the bags of moose ground patiently waiting in my freezer. With hunting plans foiled by a persistent health issue, a beautiful September morning was as good as day as any to whip up a trial batch of three flavours of moose sausage: jalapeno/cheddar, chorizo(ish) and bratwurst.
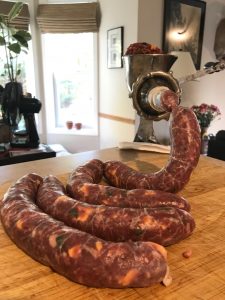
I won’t dive too deep into the sausage making process, there is so much material available, I don’t need to add to that. Here are just a few highlights, observations, and recipes adapted from online sources that seems to be quite OK for our palate.

The meat

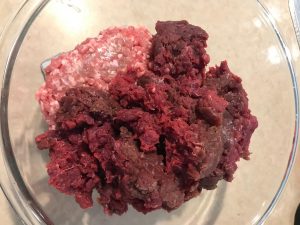
We mixed clean moose ground (removed most of the undesirable tissue before grinding) 50/50 with store bought lean pork ground. I feared we would be a tad low on fat on the final product and I was right. Next time I’ll look for something a little fattier to mix in. But I don’t mind a fairly dry sausage, so in a pinch I’d use the same mixture again.
The spices and additives

For the jalapeno/cheddar we used regular old cheddar, but I saw a thing called ‘high-temperature cheddar’ on the sausage making supplier’s list later. Perhaps that resists melting during the cooking process a bit better, so the cheese doesn’t run out of the sausage as much as regular cheddar.

All the other ingredients were just what we could buy at local grocery stores. Some of the more exotic ingredients were not available without going into the city, which I didn’t do.

The recipes

I’m just giving the ingredients. Everything was mixed well, and stuffed into real hog casings (29-32mm in diameter) using a hand-powered cast iron stuffer. Yes, those still exist.

Jalapeno cheddar
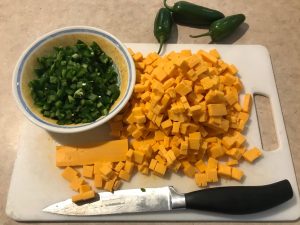
jalapenos (medium size, pits and white stuff on the inside removed; diced)
1/2-1 lb cheddar (one source called for a full pound of cheese, I ended up using less)
4 tsp salt (next time I’ll do 3 tsp, as it came out a bit salty)
2 tsp black pepper
1/2 tsp sage powder
1 tsp garlic powder
1 tsp garlic powder
1 tsp smoked paprika

Chorizo(ish)
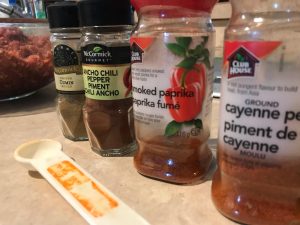
I’m calling it Chorizo(ish) because we couldn’t find a number of ingredients, and shied away from some of the quantities of spices mentioned in a recipe we found. We were going for a milder taste, not a burn-your-tastebuds-off-your-tongue experience (adapted from this recipe at honest-food.net).

1kg moose + 1kg pork
3 tsp sea salt
1 tsp cayenne
2 tbs ancho chili powder
1+ tsp chipotle paste (I couldn’t tell you how to get this, my wife brought some home from work. It’s really concentrated stuff. Could possibly be replaced by the chipotle chili powder I saw at Safeway
2 tsp cumin
2 tbs oregano
8 garlic cloves
1 tsp smoked paprika

Bratwurst
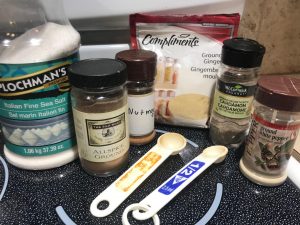
Ended up using 1 kg of pork ground and 3/4 kg of moose for this mixture.

2.5 tsp sea salt
1/2 tsp sage
1/2 tsp cardamom
1 tsp white pepper
1 tsp ginger
1 tsp allspice
1/2 tsp nutmeg
1 onion chopped finely

We have two more 3 kg bags of moose ground in the freezer. I am so happy that my friends convinced me to come back out with the rifle after an exhilarating archery season, even though it felt like cheating at the time. The bounty coming from this animal has no end (well, sadly it will have an end, but for now, we are still eating it).
Moose tongue cakes

Like crab cakes, but made from moose tongue. Sounds delicious?

The other day I finally found the moose tongue that  I knew was hiding in one of my freezers. As I announced my plans to make a dish out of it, my wife immediately declined any further involvement, including the eating part. My kids were reluctant to share my enthusiasm, but not immediately opposed to the concept. In order the stay as mainstream as possible I decided to try to make breaded patties from shredded/cut-up meat and fry those up in some oil.

Step 1: Get a moose tongue

You can try the hard way, the saga of which you can read here: “Your Mother Mated a Donkey!”. Or perhaps you can ask anybody hunting moose for a tongue, chances are he or she wasn’t even planning on bringing it home anyway. Prepare for weird looks and comments of disgust.

Step 2: Clean the tongue and boil it

In my case the tongue had been inflicted some damage during the retrieval process, so it needed a decent wash in cold water, and removing of the tip which was torn up (done prior to freezing).

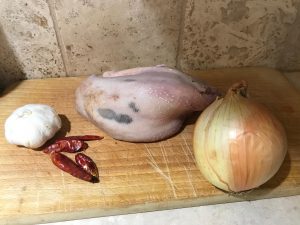
For the boil I used 50/50 water and stock, and I added salt, garlic, dried chili peppers and some onion. Boil for 4 hours.

Step 3: Chill in ice water and peel

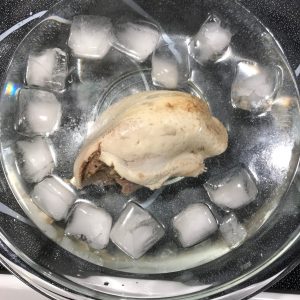
The outer layer of the tongue is practically inedible and needs to be removed. According to those in the know, this works best of if you dunk the tongue in ice water after the boil. The top layer indeed came off fairly easily. Remove any tissue that either looks offending of feels like it would take more than five minutes of chewing.

Step 4: Shred, season and bread

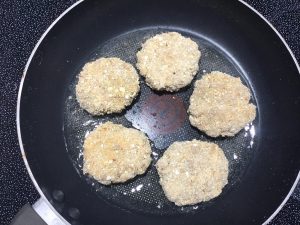
Shred the meat or cut into very small chunks. Shredding is better, as it will be easier to form the cakes. Add spices to taste, and enough flower to make things stick. Form patties. Sprinkle on more flower, dip in egg (scrambled up with a fork), and coat with breadcrumbs of your liking.

Step 5: Fry in oil

Self-explanatory I would think. Don’t set the heat too high, as you want the meat to heat thoroughly before the breadcrumbs burn.


Step 6: Throw away the moose tongue cakes and order a burger

I bet you believed me. But actually, they tasted pretty good. The meat is on the fatty side of the spectrum, so the texture is not what you’d expect from venison. The first bite was a bit weird therefore (I never had moose tongue before). But I ate two, my son ate one, my daughter tried a bite and said she would have eaten more had she not known it was tongue. My wife staunchly refused, despite admitting that it smelled delicious.

I tried a piece cold after running an errand (picking up hog casings for making sausage), and did not enjoy it. Eating fatty meat when hot is one thing, eating it cold did not agree with my taste. In any case, it’s an interesting cut of meat, worthy of attention. There is a myriad of other things it is suitable for apparently, even as a cold cut for sandwiches. Next time I get a moose, I may have to try that. My wife already said “no” to that as well.

Project Duck Boat – Part V (Finale)

The alarm went off at an ungodly hour, and it took a quick shower to get some of the haze out of my head. I don’t know who these people are that jump out of bed straight into their boots, and are ready to go, and I don’t understand how they do that. Regardless of what the day ahead has in store, waking up is a process for me. With joints creaking I took the dogs out for a quick one, and slowly the blood started pumping and the brain geared up.

It was a long dark drive to the lake I had scouted out in the spring, and this being opening day, I feared I’d show up at the sandy staging area on the North side a little late, with other hunters out on the water before me. This sneak approach really only works if you are the only one, or the first one, to paddle along the reeds.

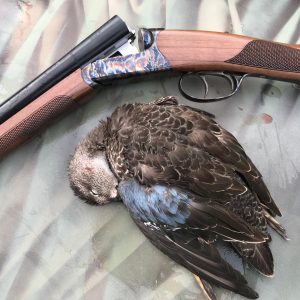
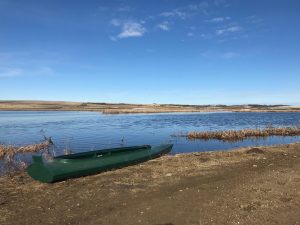
I needn’t have worried, nobody was there. It was still cold, and the last of the fog was rising off the water as I set off. In spring the marsh had been full of sound of ducks and geese. It was a lot quieter now. The 20ga loaded with steel shot #4s rested on my right, and slowly I paddled the meandering water. When a couple of teal came soaring past, I dropped the paddle, grabbed the gun, swung, and missed twice. Not a great start.

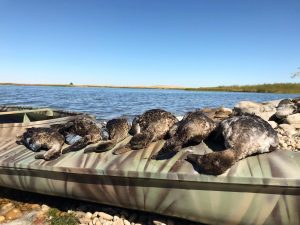
A little later I happened upon a pair of teal, that took off as soon as I came around the bend, and I managed to drop one! As the morning progressed I added three more to the tally, before I ran out of suitable water. There had been some gun shots on the south side of the lake but otherwise I had the place to myself. Plenty happy with my modest harvest I drove home.

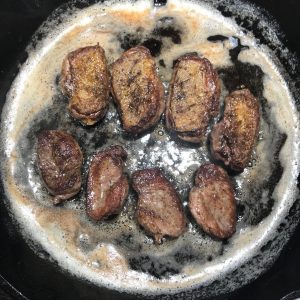
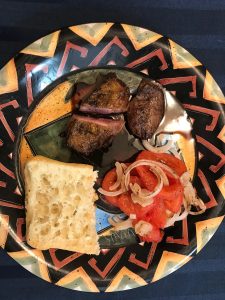
That night we had a wonderful dinner of pan-seared duck breasts. Ducks make a fantastic meal, if treated right, meaning searing it on high fire and briefly. You want, no must have, the insides still pink, or risk the meat turning dry and livery.

We ate this with ciabatta bread, oven-roasted tomatoes and onion, and a balsamic reduction drizzle (that’s nothing more than balsamic vinegar mixed with brown sugar, allowed to simmer for a bit to make it thicker). It was fantastic!

A week or so later I repeated the routine, hitting up a larger reservoir that has, according to Google Earth, lots of bays and islands on the East side. I’d love to report about my shooting prowess, how I plucked the ducks and geese from the sky with ease, but that would be lying. Two double misses started the morning, but luckily I was up for some redemption and ended the day with a tally of six ducks. The number of shots fired will hopefully fade from memory, as my brain chooses to remember the highlights of the day only.

This is not a way to get big bag limits, and it was never intended that way. But it allows quiet time on the water, taking in the sights (like the two otters I saw on the first outing), relaxing through the morning, and potting the odd bird for dinner. It’s nice too to vacate the water before noonish, as this is generally a day resting area for birds, migrating birds in the latter half of the season, and they need their quiet time too.

And that’s it. Project Duck Boat finished, but in a way it’s just beginning. We have a month or so left of open water, suitable for such a little boat. I have no intention to fight the fall storms and freezing water. I can get hypothermic in other places without the risk of drowning. Next spring, pike will be waiting in the reeds, to eat the fly that I will present to them.

Good times!


Project Duck Boat – Part IV

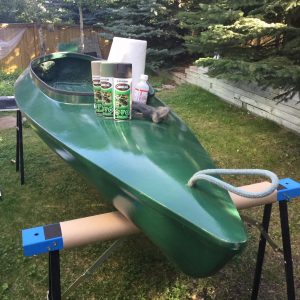
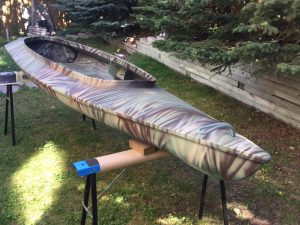
Though the solid fresh green colour of the boat really was appealing, the glare was pretty apparent, and for duck hunting purposes it would likely be better to have some drab colour on there. So I decided to try my hand at putting a gentle camo pattern on.

The Rust-Oleum camo spray cans were surprisingly hard to find. I had to go to three hardware stores to get three colours: brown, tan, and light green.

The process was pretty straightforward. After a quick scrub down with steel wool and rubbing alcohol, the boat was sprayed with  a base layer of varying colours; four areas of solid colour covered the whole thing. Then I used dry cat tail stems and leaves as a stencil of sorts, spraying contrasting colours across the leaves. For sharp edges, the leaves would lay flush with the boat, for a more fuzzy effect I’d hold them up a little higher. In general, I didn’t give it too much thought, and fought my inner perfectionist from overworking the colours. Just flop on the plant material, and with quick squirts from left to right and back, get some paint on.

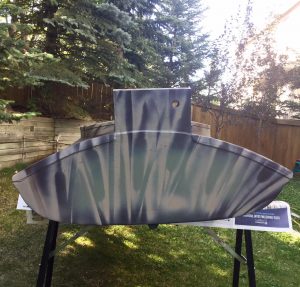
For example, on the stern of the boat, the pattern was achieved by laying a base coat of brown and green, and then spraying a layer of tan with leaves/cattails held in front of it. The tan went through the openings in the plants, leaving the darker base colours to show through on the boat. It’s a lot easier to do than it is to describe.

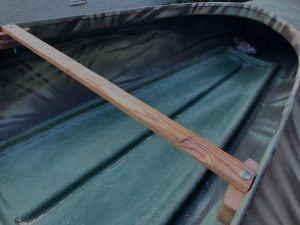
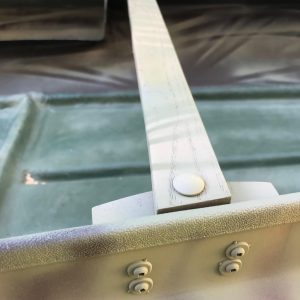
The final touch (for now) was to add a cross bar, which would serve as a rest for the gun barrel(s).  I didn’t feel comfortable laying a loaded shotgun down flat on the bottom of the boat, because an accidental discharge (never happens, right?) would have some very wet and potentially life threatening results.

A few final squirts of camo paints, and she was all done. Well, almost; I added a strip of rubber on the right side of the cross bar to be gentler on the gun’s finish.

The boat was ready, and duck season was just around the corner (see part V – Finale).

Project Duck Boat – Part III

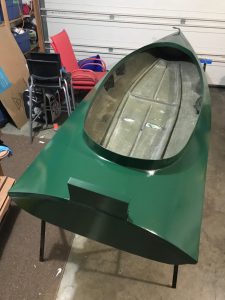
The boat was looking pretty functional, but the inside needed some tuning up, fixing cracks and chips in the gel coat, adding some foam to the flotation and putting on the top trim.

The push fit trim fit perfectly, and will provide protection from and for the fiberglass edge.

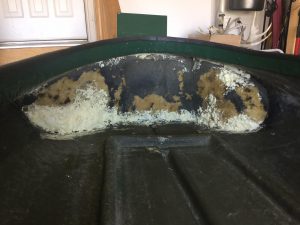
The polyurethane foam from a can was nasty, sticky, and probably unhealthy stuff to work with. It stuck to tools, to hands (gloves!), the floor, my clothes, and some of it even to the old foam in the boat. I could not make this look fancy, so I settled for functional.

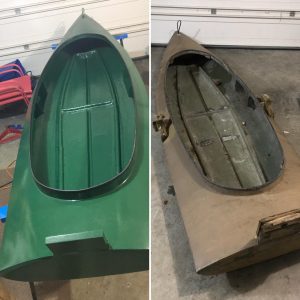
After patching the inside bottom, it was time for the final coats of paint and varnish. The transformation was spectacular, if i may say so myself.

I decided to not rebuild the oar locks. In fact I built one, from hardwood , but didn’t put it on. The boat is more like a square-stern kayak, and the oar locks would be sitting quite close to the rower, making for an awkwardly short stroke. I would paddle it like a canoe at first and make further decisions later.

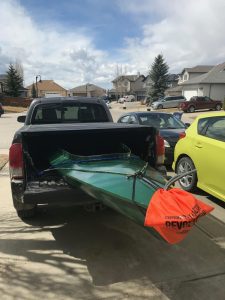
I had some trepidation if I would actually be able to transport it in the truck, but that worked out OK.

The maiden voyage took place on a beautiful spring morning. I went looking for snow goose, found none, but did manage to sneak up on dozens of waterfowl, within easy shotgun range. The concept of using this boat to cruise the edges of lakes might actually work!

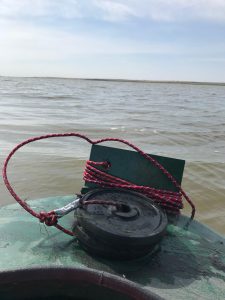
After this first trip,  I decided to add a hole to the outboard mounting plate, so I could rig up an anchor of sorts, which would be helpful for fishing trips.

With spring season over, it was time to put on the final tweaks (see Part IV).


Project Duck Boat – Part II

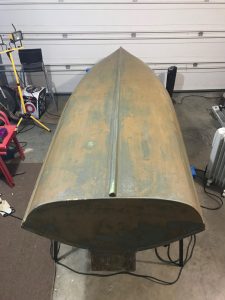
After a thorough clean and a a proper sanding job, two things had become clear. Firstly the outside of the hull was not in as bad a condition as I had thought, and secondly, there were a lot or divots, scratches and imperfections to fill up. I decided on a skim coat of epoxy for most of the underside.

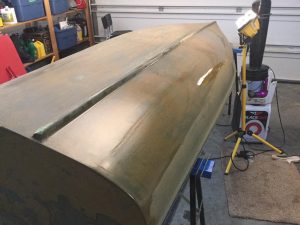
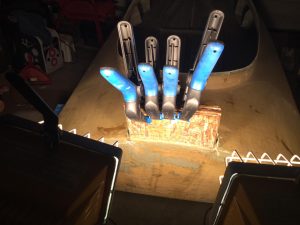
Since I was using slow-setting epoxy, the same kind I used when building the longbow (see Building a Longbow – Part II ), I needed a source of heat the keep the epoxy well above room temperature while outside the snow was blowing and it was freezing hard. I went through a number of heaters. My electric ceiling heater overheated and started spewing smoke, and a heating fan motor just stopped. The plug of an electric radiator became so hot that it could only be used a few hours at a time. The construction lights proved the most reliable but they only covered smaller areas. (lights below are pointing upwards to reduce the glare for the photo)

It took about a week to get the skim coats done, and a first layer of primer put on.

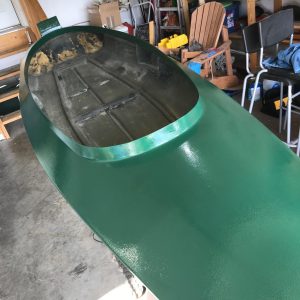
The next step was very satisfying: putting on a coat of paint! Not wanting to spend hundreds of dollars on a true marine paint meant for vessels that are in the water for long periods of time (like in a harbour), I picked paint that was meant for surfaces exposed to water, but not necessarily submerged all the time. The outside of the boat looks like the million bucks I didn’t spend, once done.

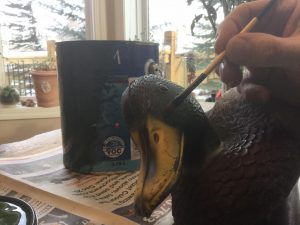
I used the same green to touch up some mallard decoys.

The inside of the boat still needed a fair bit of work (see Part III)

Project Duck Boat – Part I

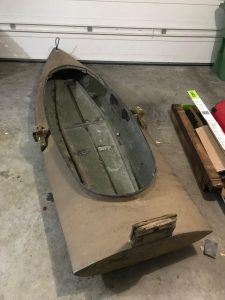
She came to me on a cold November evening, and was unceremoniously dumped onto my garage floor. When Lee had said she might need a bit of work, he hadn’t been kidding. Anything wood was crumbling, anything metal had rusted, the fiberglass would need some touching up, trim had partially come off and was swaying gently in the cold Western breeze. But on the bottom lay a gentle layer of mud and grass, faintly smelling of the marsh. A few duck feathers clung to the hull, stuck to a patch of dried-up blood. It was clear: this was my new duck boat.

Where I live, it’s rather hard to give a boat, or anything really, a good hose-down between mid-October and some time in April. First of all, the water will be disconnected to prevent freezing of the pipes, and unless you want to turn the cull-de-sac into a hockey rink, water is best not used outside. But a series of buckets with hot water and soap turned to mud as I tried to clean my new prize inside and out. The kitchen drains did not clog, so I must have diluted the grime sufficiently.

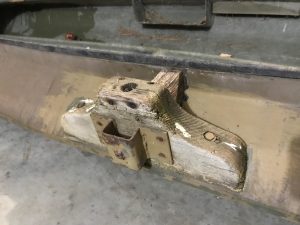
The boat was stripped of anything that would come off: the oar locks, protective strip along the top and the piece of rotten wood on the transom. Before me now lay a blank slate. One in need of some serious sanding, a coat of epoxy and a few layers of paint. But first the most pressing issue needed to be addressed, the rotten outboard motor mount.

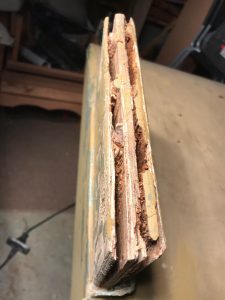
I have no immediate intention to use a motor, but it would be nice to have that option some day. Unfortunately the wood of the mountain plate was very wet and very decaying. All the softwood layers of the multiplex had turned to mush, in I spent a few days prying away at it to get that out as much as I could. Then I set the boat upside down and ran a heater under the transom for a long time, until, much later than I had thought, the inside appeared to be dry. In the mean time I started work on the hull (see Part II).

Enter modern chemicals, which according to the label turn mushy, punky wood into rock-hard material. Not sure if it did, but I poured it on thick. Next I used hardwood and bamboo strips and an epoxy to fill up the voids. It still being the middle of winter, all use of epoxy required lamps or heaters to provide a temperature that allowed it to set.

Once that was done, I rebuilt the outside by using aluminum strip, filling the surface with more epoxy.  Time to continue working on the hull!

(Continued in Part II)